
When you create a new document type in DOConvert, you can define the structure and fields for the documents that the system will process. Follow the steps below to create a new document type:
Step 1: Access Document Templates
- Navigate to the Document Templates: On the left-hand side menu, click on "Doc Templates".
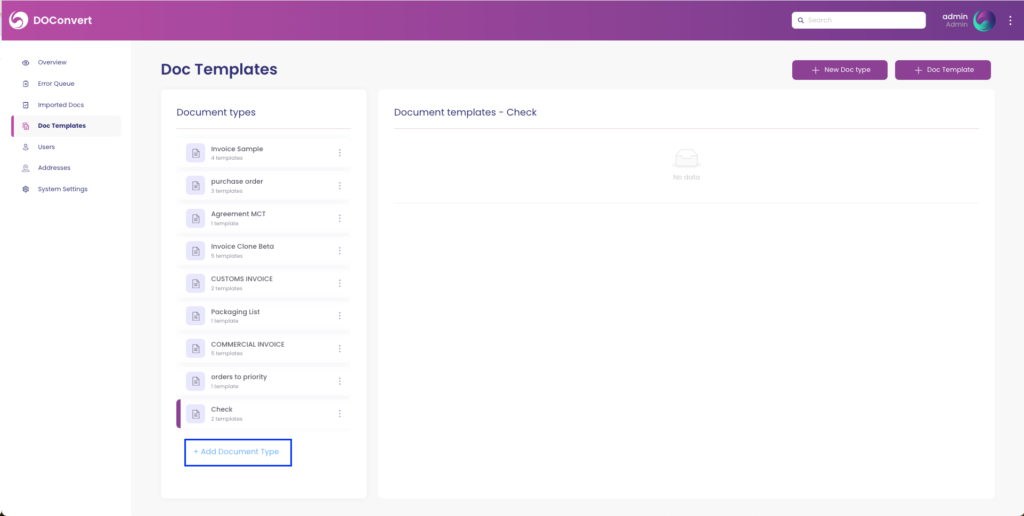
Step 2: Add a New Document Type
- Click on "Add Document Type": Located at the bottom of the "Document Types" list, click on the "+ Add Document Type" button.
Step 3: Fill in the Document Type Details
A form will appear on the right side of the screen where you can start filling in the details for your new document type.
- Document Type Profile:
- Document Type Name: Enter a name for your document type.
- Integration Entity Action: Select the integration entity if applicable. This refers to seamless integration with the system of records.
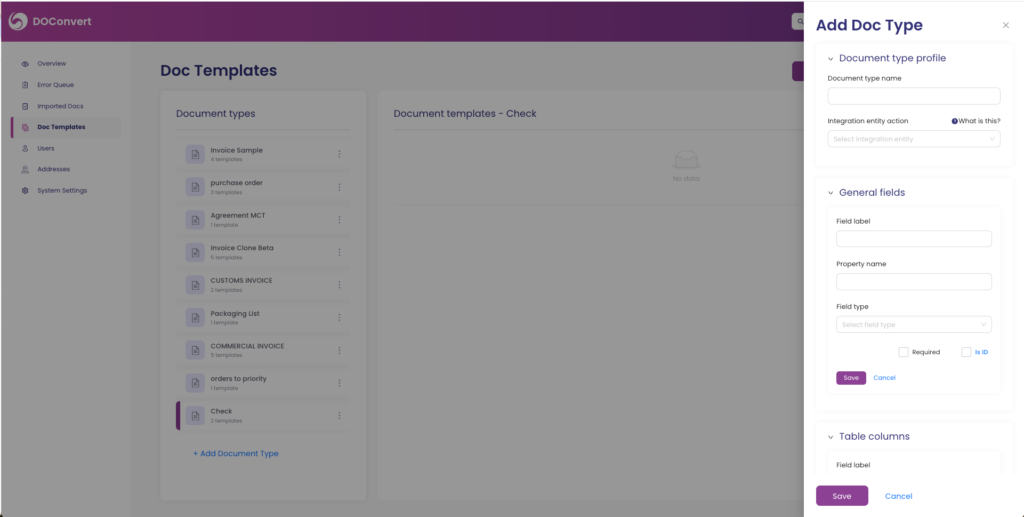
Step 4: Define General Fields
General fields are the main data points outside any table structure within your document.
- Field Label: Enter the label for the field.
- Property Name: Enter the property name.
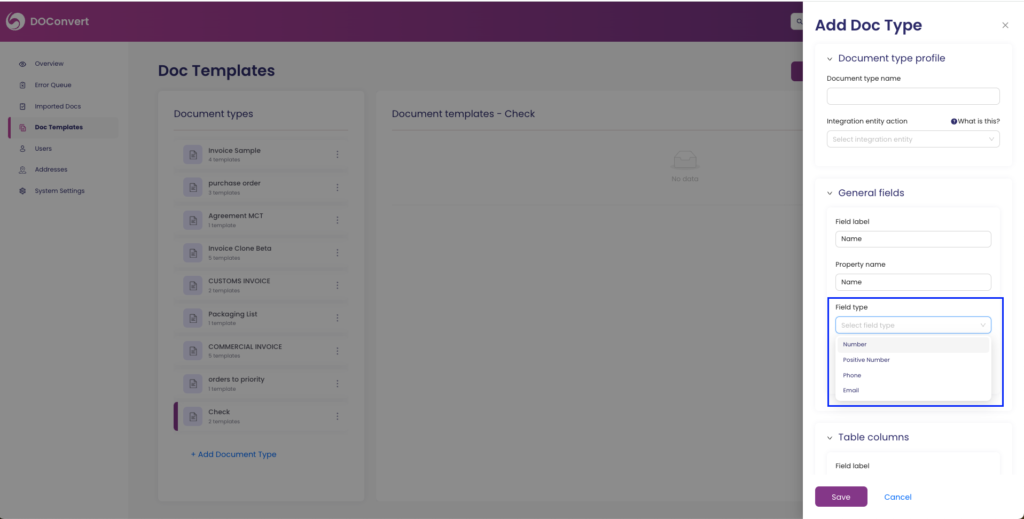
- Field Type: Select the type of field (e.g., Text, Number, Date, etc.).
Step 5: Define Table Columns
If your document type includes tables, you can define the columns here.
- Field Label: Enter the label for the column.
- Property Name: Enter the property name.
- Field Type: Select the type of field (e.g., Text, Number, Date, etc.).
Step 6: Set Field Properties
For each field, you can set additional properties such as:
- Required: Mark if the field is mandatory.
- Is ID: Mark if this field will serve as an identifier (e.g., invoice number).
Step 7: Save the Document Type
- Click on Save: After filling in all the necessary fields and properties, click the "Save" button at the bottom of the form.
Your next step is to create a Doc template, see this page: